Headlight restoration in five steps
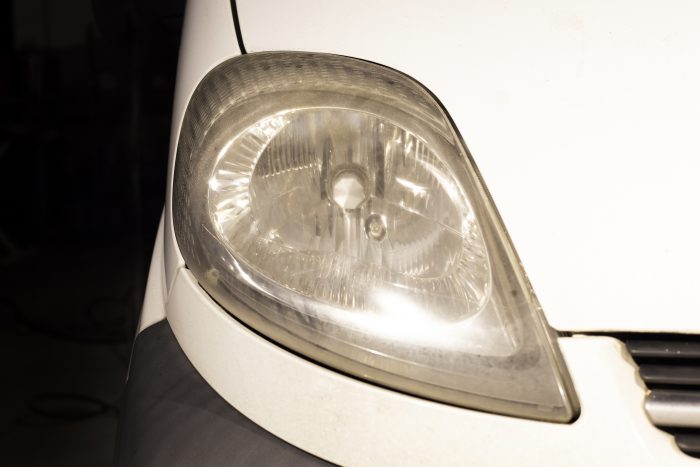
You see them regularly on the road: cars of which the headlights have just become a tea light. Older cars in particular suffer from dull headlights. Headlights used to be made of glass, but nowadays they are made of plastic. A protective layer is applied over this plastic that protects against UV radiation and other external influences. However, this layer wears down over time due to rain, stone chippings and UV radiation. That can be fixed though.
Products for restoring the headlights
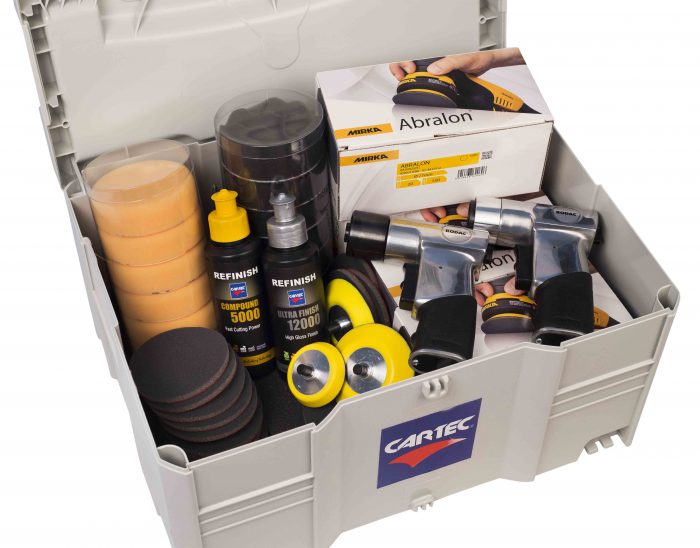
Cartec has developed a special kit for this purpose, called Headlight Restoration Kit. This is the contents of the kit:
- Rodac sander 75 mm
- Rodac rotary polishing machine 5 mm
- Abralon sanding discs P500
- Abralon sanding discs P1000
- Abralon sanding discs P2000
- Abralon sanding discs P4000
- Refinish Compound 5000
- Refinish Ultra Finish 12000
- Yellow and grey polishing pad
What you do before you start polishing
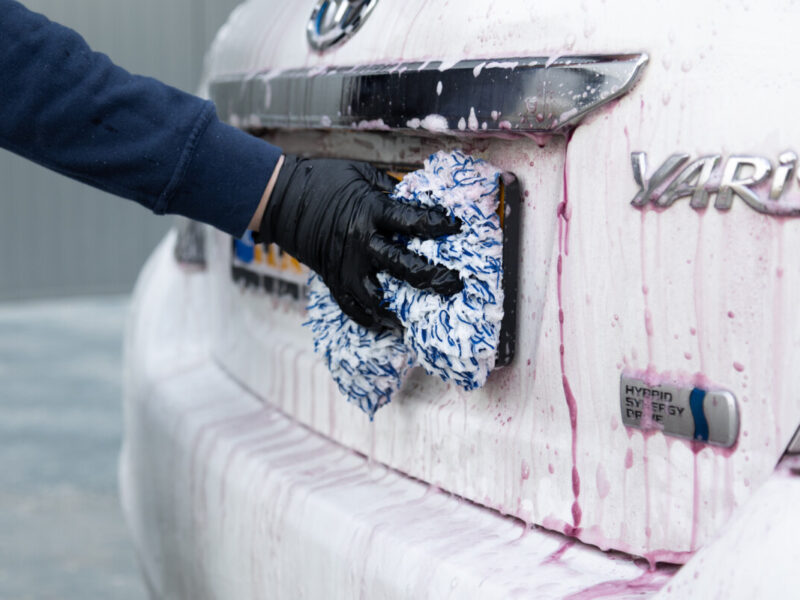
To make headlights bright again, it is first of all important that the car is clean. Wash the car and headlights thoroughly. Make sure they are well dried before you start so that the masking tape adheres well to the paint.
On some car models the headlight units are very easy to remove. This makes it even easier to reach the headlight during sanding and polishing. If this is not or not easy to do, make sure you tap the paint around the headlight well. Open the bonnet so you can create more working space for yourself.
Don’t feel like reading? Watch the instruction video!
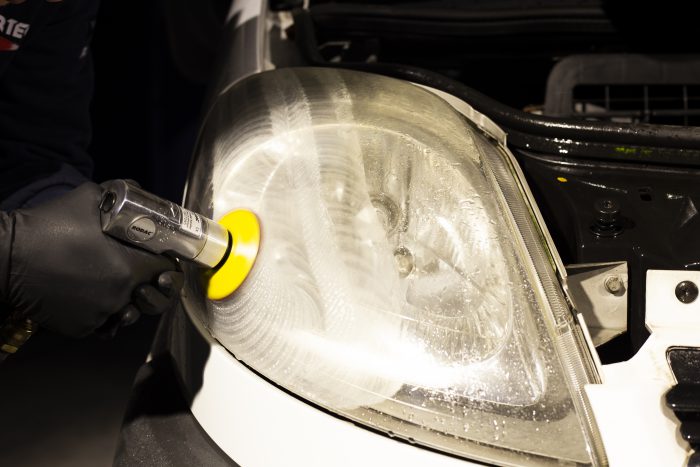
Step 1. Sanding the headlight with coarse sandpaper
Place the P1000 sanding disc on the Rodac sander and spray it moist with water. Also spray the headlight moist with water.
Tip: fill a bottle with water for easy and controllable spraying.
Be careful not to use too much water, as this will cause the sanding disc to grind less. Too little water will not ensure that dirt is properly removed. Move the sanding disc with medium speed and even pressure over the headlight.
Make sure you hit all parts well. You will see that a milky substance is created. This is residue that you grind off from the headlight.
After a number of sanding steps where you overlay fifty percent during sanding, clean and dry the headlight with a microfiber cloth. You will see that the headlight is completely matted. Make sure it has the same matting everywhere for an even result.
When sanding headlights you start with a relatively coarse grit, P1000, just like on paint. The P stands for ‘particles’. The more particles there are in the sanding disc, the finer it grinds.
If you now have extremely weathered headlights, you can also start with P500. Be aware that this will make you sand faster and grind away more surface.
Step 2. Sanding the headlight with fine sandpaper
Place the P2000 sanding disc on the sander and also spray the disc moist. Spray the headlight moist and sand the headlight again. To completely remove sanding scratches, sand twice as long as in step 1. For example, did you sand for 1 minute with P1000? Then sand for 2 minutes with P2000. After sanding, clean and dry the headlight again. You will see that there is already clarity in the headlight.
Step 3. Sanding the headlight to high gloss
The last sanding step is sanding with P4000. This refines the sanding scratches and makes it easier to get high gloss and the highest possible brightness in the headlight. Again, spray the sanding disc moist, as well as the headlight.
Sand the headlight until an even result is achieved over the entire headlight. Clean and dry the headlight with a microfiber cloth.
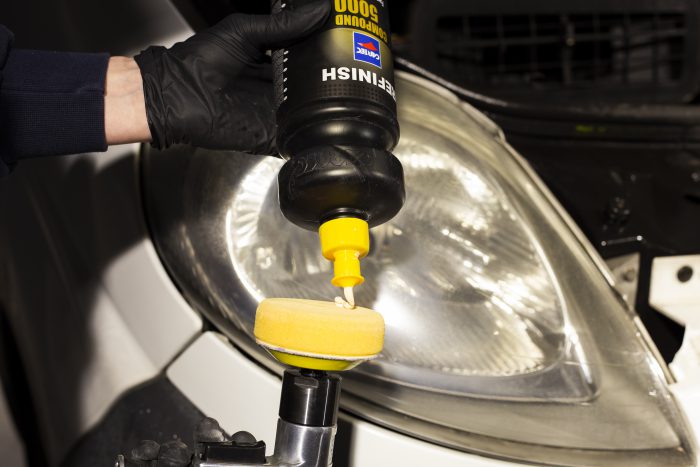
Step 4. Polishing the headlight
Place the yellow pad on the Rodac Polisher. Apply Refinish Compound 5000 to the pad and massage the whole pad well with the Compound. This ensures a better polishing effect.
Then polish the headlight at a medium arm speed with a fifty percent overlay. Wipe off the polishing residue with a microfiber cloth. Repeat the same step, but with Refinish Ultra Finish 12000 and the grey polishing pad.
Protect the shine
To give your shiny headlights just a little extra, you can protect them slightly from wear and damage with the following treatments.
First thoroughly degrease the headlight with Panel Spray. Then apply a protective layer to it. For example Clear Paint Spray. Keep in mind that clear varnish is very misty, and spray mist can occur. We therefore recommend masking well (or disassembling headlights). You can also treat the headlights (or have them treated) with Ceramic Guard coating.
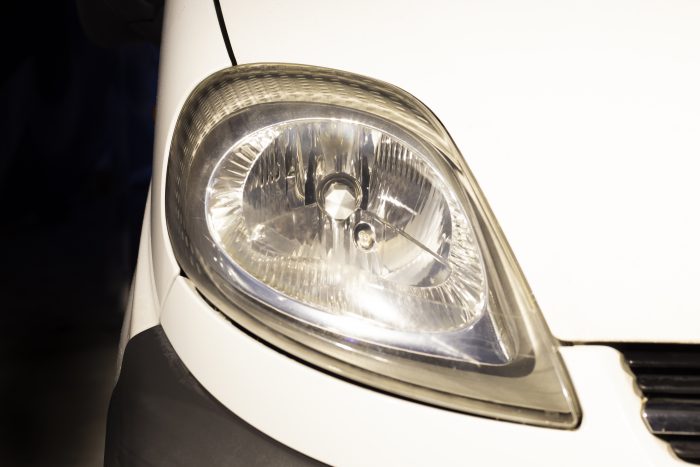
The headlights look like new again and will shine for years!
Also read: “How to remove scratches from a car’s paintwork“